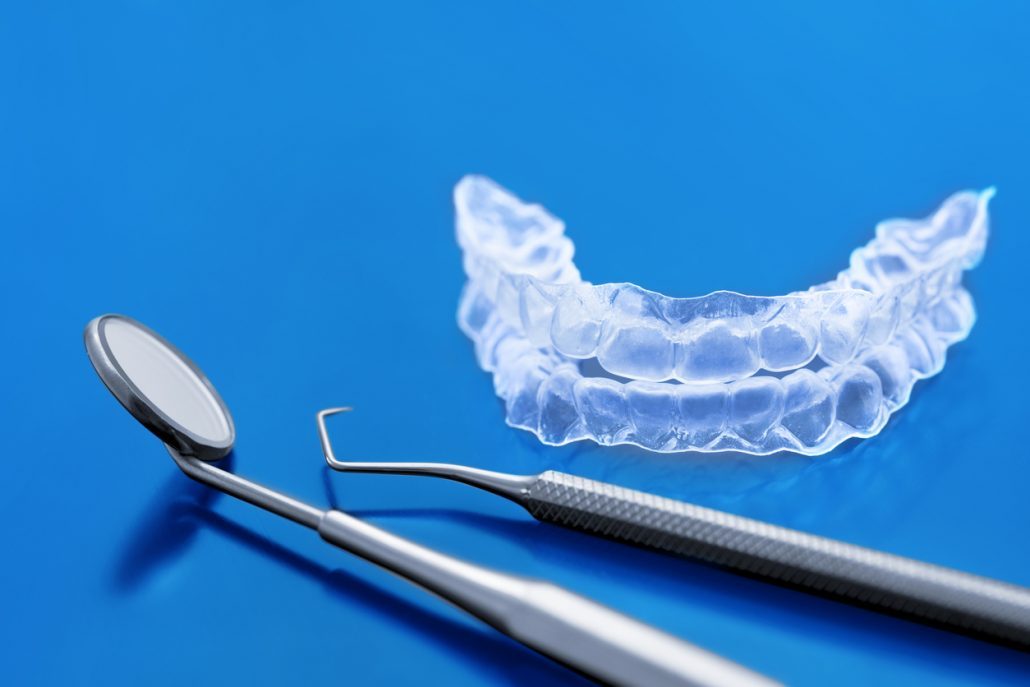
How To Floss With Braces – The Right Way

,

Flossing can be a difficult task to remember and perform daily and that task is made even harder when attempting to floss with traditional braces in the way. However, flossing is a vital part of good oral hygiene and is especially important when you have braces.

The brackets and wires used to form traditional braces supply excellent hiding places for bacteria to grow, while making flossing much more challenging. But don’t despair! Through the use of proper flossing techniques discussed in this article, you’ll be a master of flossing with braces in no time and be on your way to a healthier, happier smile.

Woman learns how to floss with braces on her teeth

Why Is Flossing Important – Especially When You Have Braces

Most of us have been told by our dentist that we need to floss more, but why exactly is flossing such a big deal? The food and drink that we consume on a daily basis introduce acids and bacteria into our mouths. Brushing twice a day can be very helpful in getting rid of this bacteria and maintaining your oral hygiene, but some areas of the mouth require a little more attention.

This is where flossing comes in handy. Certain areas of the mouth, such as between your teeth, provide an area for bacteria to hide. These areas can be difficult to clean simply by brushing your teeth. However, using wax-covered floss to clean in between your teeth helps to clean these hard to reach places.

When you add braces into the mix, this creates even more surface area for bacteria to take hold, making flossing even more important. Failing to keep up with a good, daily floss routine with braces can have a negative impact on your oral health, leading to issues, such as:

  • Stained or yellow teeth
  • Gum disease
  • Tooth decay
  • Odorous breath

Step By Step Instructions For Flossing With Braces

The reason flossing with braces is so difficult is due to the wire running through each brace, connecting them, known as the archwire. This wire prevents you from flossing your teeth the traditional way as it does not all the floss to come all the way up between your teeth. Fortunately, there is a method to get around this snag.

When flossing with braces begin by threading the floss through each gap behind the wire of your braces, making sure not to pull on the wire with the floss. Once you have gotten the floss through, proceed to run the floss gently between your teeth. Repeat this process until you have flossed between all your teeth.

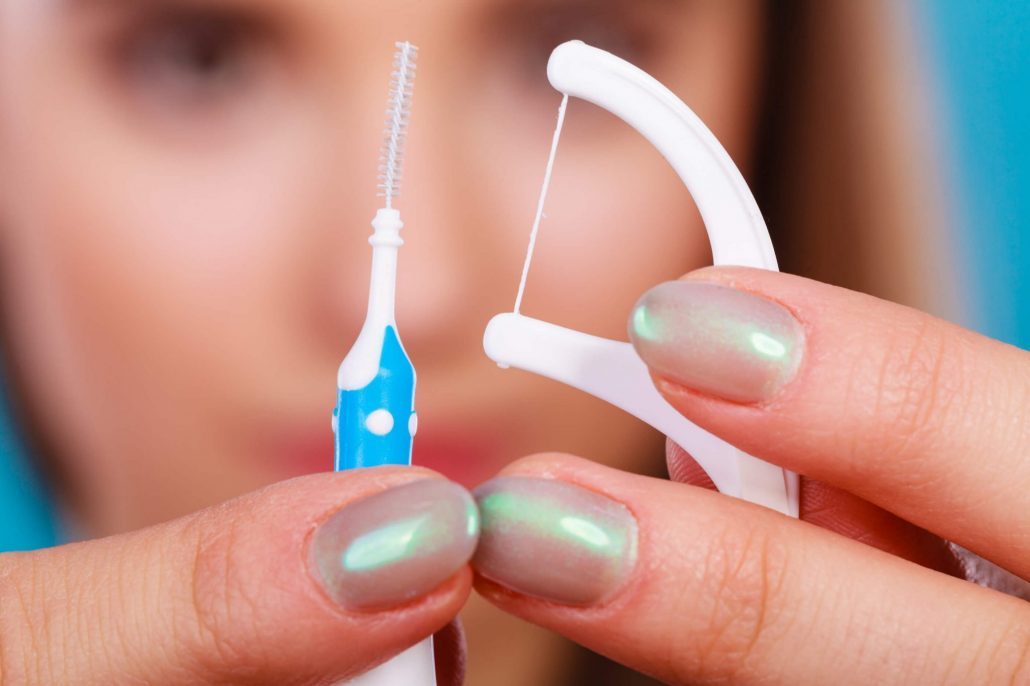
Be sure to use wax-covered thread for floss. Non-wax floss has a tendency to become caught in braces and can leave behind pieces of floss. Another useful tool for flossing with braces is an orthodontic floss threader. The stiff point on this needle like device allows you to thread floss behind your brace wires with ease.

Remember that flossing is very important to the health of your teeth, especially with braces. Brushing twice a day can do wonders for your oral hygiene, but making sure you floss at least once a day should absolutely be part of your routine.

Recommended Types of Floss

As a consumer, you have several different options when it comes to choosing the right type of floss for the job. Traditional dental floss can typically be purchased in a multi-strand (multifilament) or single-strand (monofilament) form. You also have the option of getting either wax-coated or non-wax floss (we recommend floss covered).

When considering what floss is best to use with braces, you’ll want to favor a wax-coated, monofilament floss. This type of floss can be maneuvered between your brace with relative ease and with a lower chance of catching in the brackets and wires.

Another option to consider is an electric water flosser, also known as oral irrigators. This can be a great alternative for anyone finding it too difficult to floss with traditional dental floss. An electric water flosser is a device that propels a high pressure spout of water used to clean between your teeth.

Some people believe an electric water flosser may not be as effective as using dental floss. However, using an oral irrigator is still more beneficial than not flossing at all. If traditional flossing with braces is just too cumbersome for you, an electric water flosser may just be the right tool for you.

How Parents Can Help Children With Braces Floss

Remembering to floss daily can be tough, but it is even harder on parents trying to get their kids to floss. Add braces to that equation and you have the recipe for a parenting nightmare! Fortunately, we have some tips to help you keep your kid’s teeth clean and healthy.

When dealing with younger children, you may have to floss their teeth for them. Many parents find this task easier to achieve when a distraction, such as a favorite tv show, is employed. This will hold your child’s attention, keeping their head still while you help them floss. If you are helping your child floss, be sure to do this in a well-lit area.

Older children and teenagers with braces will most likely prefer to floss on their own. This can make ensuring your child is flossing properly a little more difficult. Be sure to go over all the proper techniques with them, so they feel comfortable flossing on their own. We recommend supervising this process early on to make sure your child isn’t cutting any corners!

Blue Ridge Orthodontics

The bottom line is that flossing is a key ingredient to maintaining good oral hygiene, especially if you have braces. Although flossing with braces can be a daunting task, it’s really not that bad. With a little patience and commitment, you can easily make flossing a part of your daily routine and help ensure a beautiful, long lasting smile.

BROR Monthly Special

Why You Need A Retainer After Braces

,

Happy day! You’re finally getting your braces removed after months or even years of orthodontic treatment. You made that significant investment to improve your smile and your oral health, and now it’s time to reap the benefits. But wait! Your WNC orthodontist just mentioned the word “retainer.” Why are they saying that you need a retainer right after you got those metal brackets removed from your teeth?

This bit of news does come as a bit of a surprise to some of our patients in Western North Carolina. Unfortunately, some people also don’t take their retainer as seriously as they should. You don’t want to make that mistake. You do need to wear a retainer after you get your braces taken off and here’s why.

Orthodontic retainer used after braces in North Carolina

Why Do You Get A Retainer After Braces?

Orthodontic treatment is an investment. Depending on the issues that are being treated, it can take years to fully perfect a patient’s smile. After all that time and work, you want to ensure your teeth remain perfectly aligned for the rest of your life right? This is why you need to wear a retainer after braces.

For the first couple months after you got your braces off, you will be instructed to wear your retainers regularly. This is a crucial period of time, because some relapse movement can occur after the brackets have been removed from the teeth (more on that later).

The Retainer Is an Essential Orthodontic Appliance

A retainer is a very important orthodontic appliance that is worn by patients after they have their braces removed. Remember that the purpose of this appliance is to keep the teeth from shifting out of their proper alignment. You may be wondering why this is necessary. Over time, your jaw changes and this can cause shifting in the teeth (especially if you got your braces at a young age). You also use a variety of muscles each time you speak. Your tongue for instance is a significant muscle that pushes on your teeth constantly in order to form words. This pushing can cause shifts.

Are There Different Types of Retainers?

For our orthodontic patients here in Western North Carolina, Blue Ridge Orthodontics offers 2 types of retainers after they get braces.

Fixed Retainers

A fixed retainer is essentially a wire that is bonded to the tongue side of the teeth. As the name implies, this type of retainer is meant to stay fixed in place indefinitely. depending on how long you’re fixed retainer has been in place, the bonding agent used can weaken. It is possible that harder types foods could break away the bonding and expose the wire. At this point, you should make an appointment to have your fixed retainer repaired.

Removable Retainers

If your orthodontist is confident that you will be able to wear your retainer or the prescribed duration, they may give you a removable retainer after you get your braces taken off. This type of retainer can be removed when needed as the name implies. More advanced orthodontic technology such as Invisalign and BRO’s Impressions can also function as removable retainers.

How Long Do You Need to Wear Your Retainer After Braces?

For Removable Retainers

Remember that you’re going to need to wear your retainer initially all the time. Remember, with removable retainers you are able to take them out in order to eat or drink. They are convenient, but it is so important that you stick to the prescribed duration. The bone mass around the shifted teeth will be comparatively soft during these first few months after your orthodontic treatment has completed. The retainer keeps teeth from shifting into this softer bone mass.

If you follow our instructions during the first couple months, then you can switch to just wearing it during the night. You should wear it every night if you would like to keep your teeth in proper alignment for the rest of your life.

If it has been years or even decades since you got your braces taken off, it is important to note that the teeth tend to shift naturally as people age. do you still wear your retainer at night? If you stop wearing your retainer, you may begin to notice some shifting in your teeth. If you have questions, then please give us a call at (828) 585-6045. Our orthodontists can make sure you retain the smile that you invested so much in.

For Fixed Retainers

If you were given a permanent retainer after you got your braces taken off, then it is recommended that you keep that on for at least 10 years. If your fixed retainer has not been causing any significant hygiene problems after that amount of time, then you should consider keeping it in place for as long as you’re able to. This is because fixed retainers can cause serious issues for people who are not diligent about their brushing and flossing habits.

Now if you got braces as an adult, then it’s recommended that you keep your permanent retainer in place for the rest of your life. This is simply due to the fact that the risk of teeth shifting is greater in older patients due to grinding and other adult onset periodontal conditions.

How to Take Care of Your Retainer & Your Long-Term Oral Health

Since you will be wearing your retainer regularly for a long period of time, regular cleaning and maintenance are going to be very important. Unfortunately, some patients end up slacking on the maintenance side and eventually their retainer can get pretty nasty. Some may even discard their retainer at this point. If you follow these retainer care tips, then this won’t happen to you and you’ll be able to keep that perfect smile for the rest of your life!

How to Clean Your Fixed Retainer

Since you will be keeping that fixed retainer in your mouth for at least 10 years, proper cleaning and maintenance makes a significant difference. Otherwise, your fixed retainer could put you at greater risk for gum infections and teeth cavities. Your orthodontist will provide you with a special type of floss that has a wire portion that will allow you to thread it through the teeth and under the fixed retainer. This is the only way to keep your fix retainer clean and plaque free.

How to Keep Removable Retainers Clean

Remember that removable retainers provide that extra level of convenience since you can remove them in order to eat or drink. That being said, you still need to clean them properly on a regular basis. First, we recommend that you wash them with lukewarm water after every meal. Next, you should also use a little bit of toothpaste and your toothbrush to clean them every night and morning.

Blue Ridge Orthodontics

For anyone reading this post who may be in need of adult orthodontic treatment, we do provide complimentary consultations at all of our clinics in Western North Carolina. Check out some of our before and after photos if you’d like to see what we’ve been able to do for our adult patients. As a diamond level Invisalign provider, Blue Ridge Orthodontics can offer a variety of options few orthodontists in the country can match.

BROR Monthly Special

11 Tips for the Perfect Picture with Braces

,

Between Instagram, Snapchat, Facebook and more, there’s never been a better time to flaunt a fabulous photo. But can you still get an amazing picture when you have metal braces in your mouth?

Young girl with braces flashes a beautiful smile for her profile picture

Of course you can!! This week, we’re sharing 11 insider tips that you can use to get the perfect picture.

1) You Can’t Get a Great Picture without Smiling

Trying to get the best picture without utilizing your natural smile is like trying to keep off the rain without an umbrella一it’s just not going to happen!

The team at Blue Ridge Orthodontics believes that it’s always the right time to emBRACE your look and smile through it.

2) Practice Your Smile with Your New Braces

If you’re new to braces or uncomfortable with the thought of smiling while wearing them, the best thing to do is practice. Take a little time in front of the mirror to strike a natural grin while keeping your back straight and head high. The more comfortable you are with the position, the more likely you’ll use it for those Kodak moments, plus this gives you an opportunity to familiarize yourself with your best angles. Try to smile “gently” so as to look more appealing.

3) Work on Your Flexibility and Control

When you’re not thinking about it, a smile can come as naturally as you blink, but attempting to recreate a Duchenne smile is often achieved through the perfect balance of flexibility and control. Think of a memory that genuinely makes you smile and become familiar with what parts of your face are engaged.

A good exercise to try is holding your mouth closed and stretching the corners in either direction until you feel your cheek muscles begin to strain. Practice this pose every week for greater control over your facial muscles.

4) Avoid taking a picture using the flash

Ask any photography aficionado and they’ll tell you the same thing: natural light is best when you’re trying to snap a selfie, and flash should be avoided as much as possible. Professionals rely on equipment to diffuse a flash evenly, but a regular camera or phone won’t have that capability, and its flash will only enhance the lines around your mouth and teeth. Best to rely on sunlight for a more natural look!

5) Wear the right lipstick

It’s no secret why lipstick has always stayed at the forefront of every big beauty movement: it can greatly improve your overall look and even make your teeth look brighter. Be sure to find the right shade for your skin tone, though, or you may run the risk of washing yourself out. Shades that are based in blue or pink tones, like cherry red, plum, wine, or rose, are usually your best bet, as they’ll offset the yellow stains on your teeth.

6) Be Sure to brush your teeth and braces beforehand

It’s important while wearing braces to brush your teeth after every meal, but why not go the extra mile and polish off those pearly whites before any photo op? Even if it doesn’t make much of a difference, you’ll feel more comfortable and carefree knowing that there isn’t anything caught in your braces.

7) Don’t Forget to Clean Your Gums Too

Ah, the gums! I’m sure your orthodontist has said it a million times, but gums should never be ignored, and this is especially true while you’ve got gear on. Healthy gums are the secret to having a beautiful smile for years to come. Get in the habit of bringing threaded dental floss with you everywhere and make sure to use it! It’ll give you peace of mind and guarantee a happy smile.

8) Practice Your Posture

An easy trick to looking your best in photos actually has nothing to do with your smile一standing up straight immediately improves your overall demeanor, making you look comfortable and confident. The problem is that, for most of us, good posture is not our resting state. Take an extra moment in front of the mirror to practice how you stand and try to do it frequently throughout the day. When it’s camera time, turn your head and drop your chin a bit so that your face is not aimed squarely at the lens.

9) Don’t Shy Away From the Camera

If you only take one of these tips with you today, we hope it’ll be this one一always look at the camera and smile when someone decides to take a picture of you. It’s easy to be hyper-critical of yourself at first glance, but you’ll be happier for having those memories the older you get. Looking at the camera will make you appear more friendly as well, which will enhance the photo overall.

10) Smile with Your Eyes

Tyra Banks said it best一the key to modeling is nailing the “smize,” or smile with your eyes, technique. And it’s not just celebrities who endorse it, psychologists have found that all sincere smiles involve some kind of contraction of the muscles around the eyes.

This is often known as the “Duchenne smile,” and it’s not a mechanism that most people are aware of, but using it when you smile will give your face a much more authentic look of joy and happiness.

11) Steal this Proven Celebrity Smiling Trick

Those perfect smiles you see on the red carpet didn’t happen overnight. While there are a number of tricks that celebrities use to ensure a gorgeous smile, there’s only one that we have found to be faultless: find your best side and angle it toward the light. Most people have an asymmetrical face, so finding your better side (the one with less wrinkles or bigger features) is a must if you’re going to have consistently good photos. When you know which one works best for you, it’ll be much easier to strike a pose your happy with whenever the moment calls for it.

We hope that this post has made you more confident in how you look in photographs, but at the end of the day what really matters is how you feel. A happy disposition will shine through any picture. Whether you’re on a dream vacation or rocking adult braces, remember to smile! You’ve earned it.

BROR Monthly Special